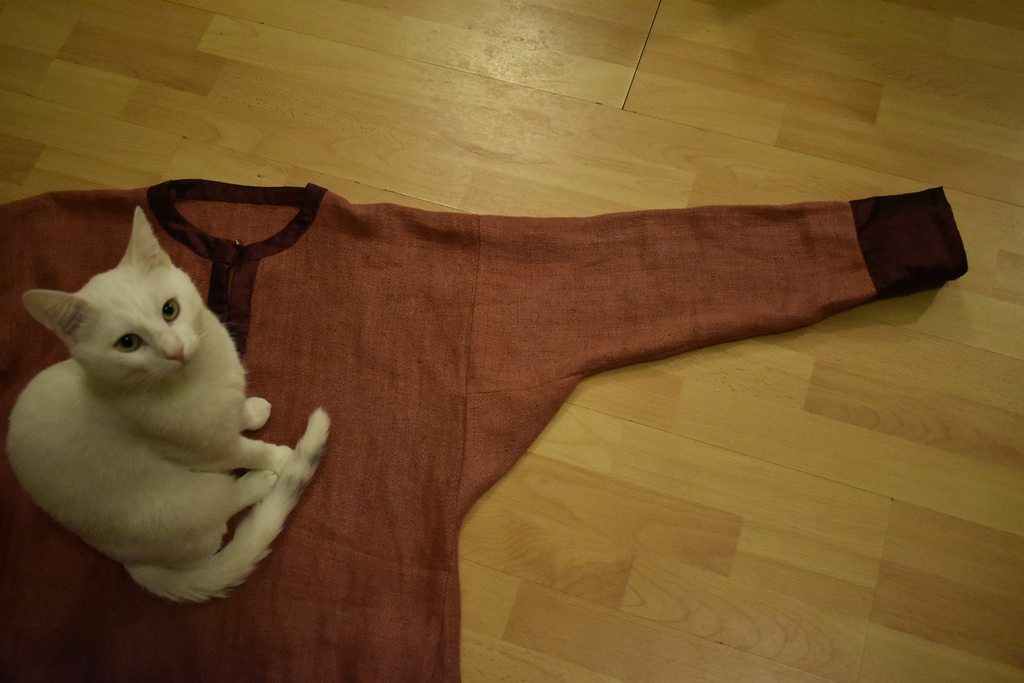
Men's shirt, Old Russia, X century

Author of the master class Irina Chulkova

Before we start measuring seven times and cutting once, we have to figure out how much fabric we need for the shirt.

I have a medium build model and 60 cm wide homespun in my sources. With a shirt length of 120 cm and a sleeve length of 70 cm, I needed 2.60 m of fabric. 

Note, if your model has a broad back, a good tummy and almost two meters tall, and I recently had such a customer, I would recommend buying one more length of homespun fabric. This advice applies only to fabrics 60 cm wide. For factory fabrics with a standard width of 120-140 cm this is not necessary.

Well, one last touch. Before you start cutting, shrink the linen fabric by washing it at 40 degrees.

1. Measures

You will need:

  • shirt length - the distance from the neck (the protruding bone of the spine) to the knee;
    sleeve length - the distance from the edge of the shoulder to the protruding bone at the wrist + 2 cm;
    shoulder width - the distance from the left shoulder to the right;
    chest circumference and sometimes belly circumference, depending on what looks more significant;
    biceps circumference + 10 cm;
    wrist circumference +10 cm;

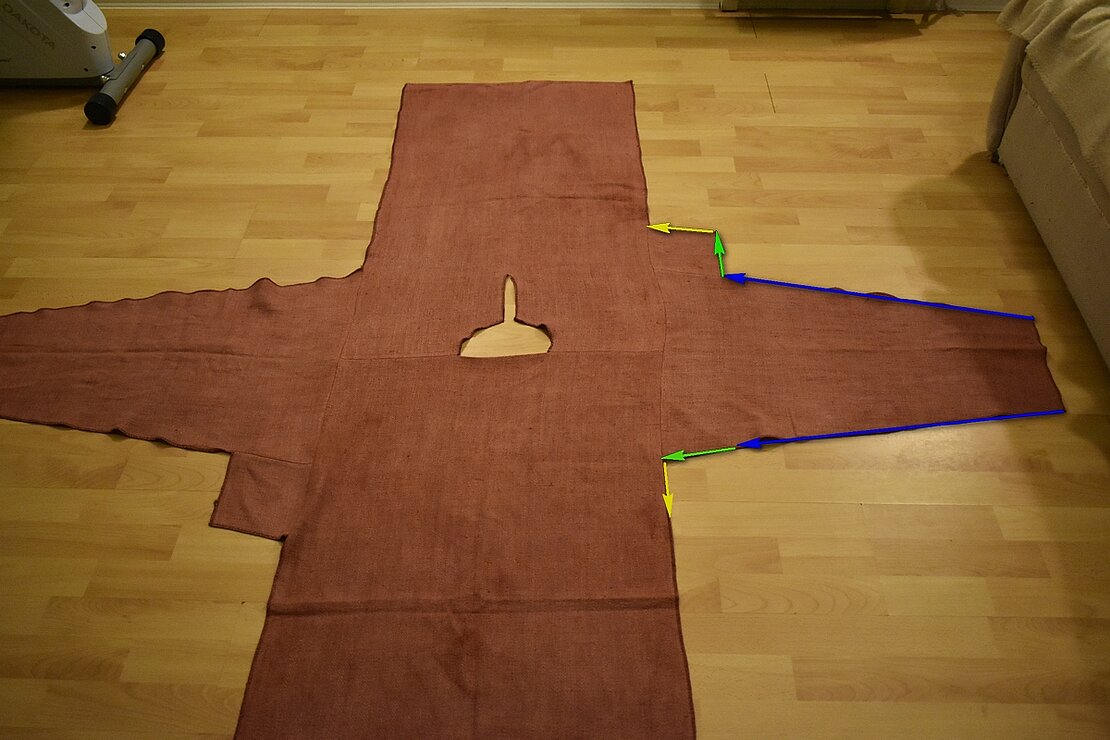
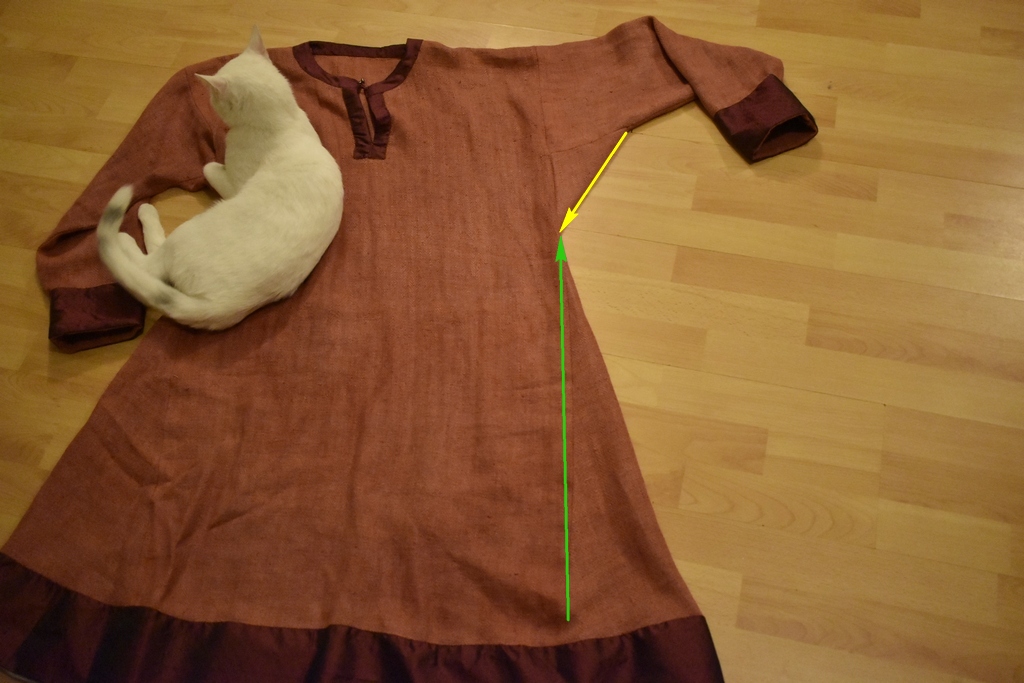
Sleeve width at the top = biceps circumference + 10 cm. Sleeve width at the bottom = wrist circumference + 10 cm. The sleeve length is already known from the measurements of the model. You should have a nice trapezoid on the material. Fig.1 shows it very well.

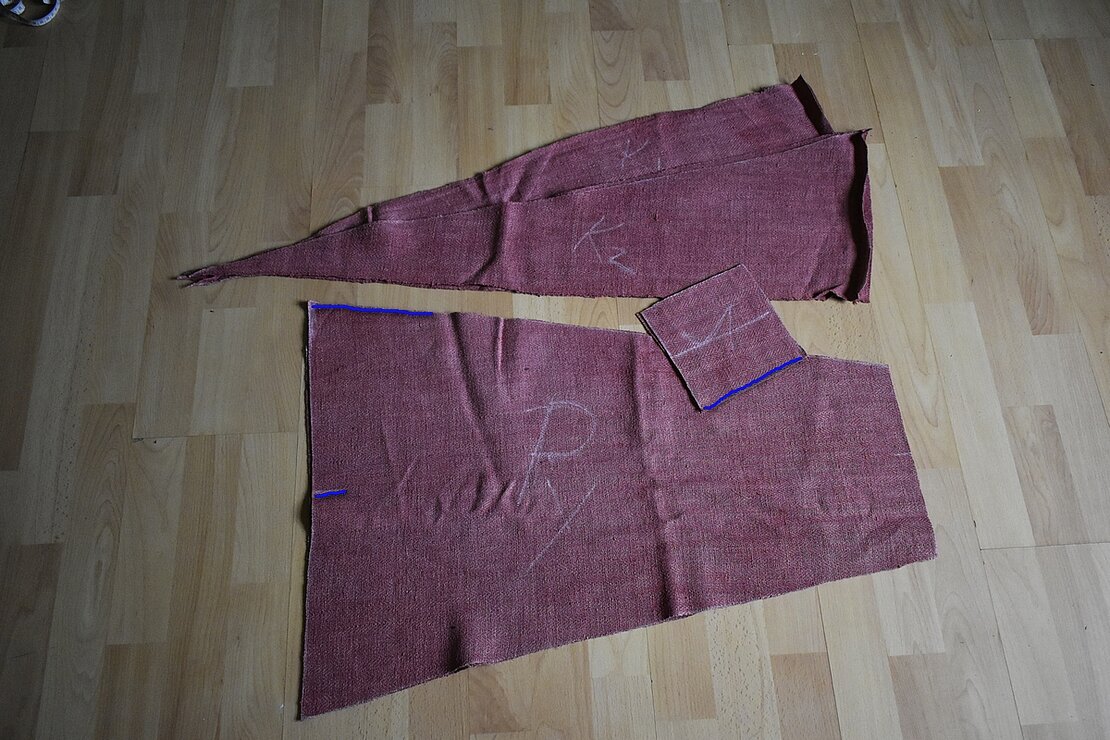
The length of the wedge is calculated according to the formula = length of the shirt - half the width of the upper part of the sleeve and - gusset.

The gusset is a 15x15 cm square which is sewn into the sleeve with one part and the other into the main part of the shirt. 

This is what your pattern will look like on a 60 cm wide homespun fabric. 

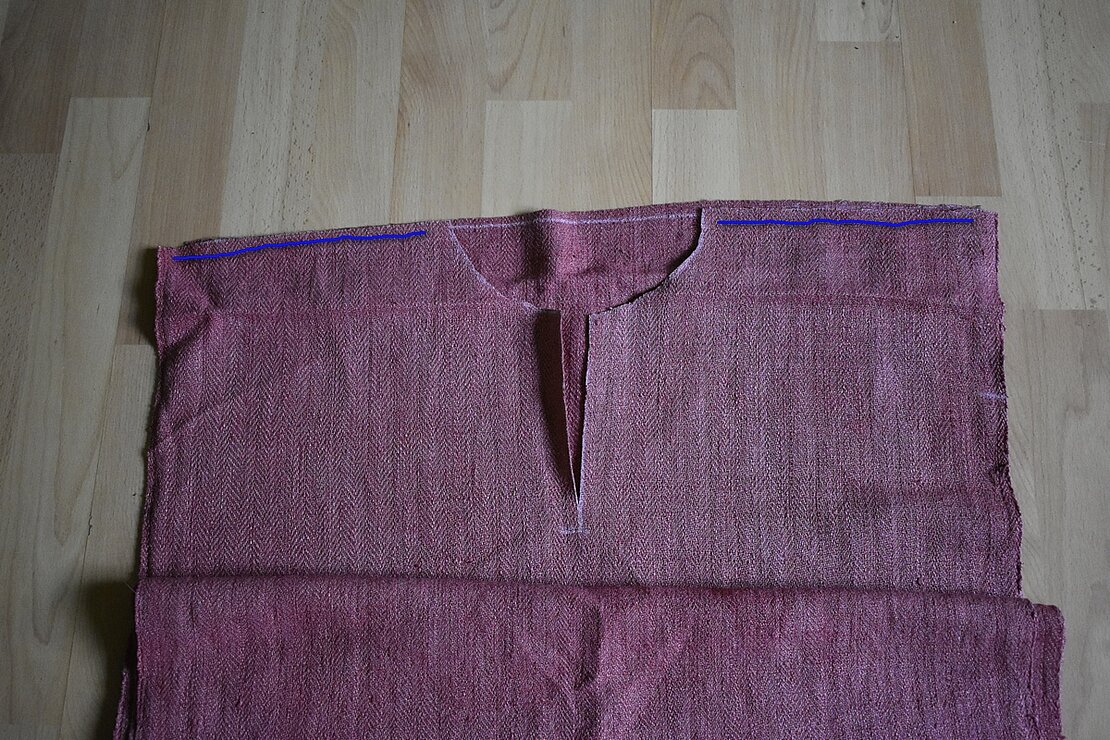
Attention! Don't forget to add seam allowances when cutting!

This is what it looked like with my cat.

So, after cutting, we have two parts of the shirt, two sleeves, two gussets and four gores. Do not be alarmed by the fact that there are four gores. They need to be sewn in the middle and only after that they can be sewn into the shirt. 

Before we start sewing all the pieces, we need to cut the neck on the shirt. I usually base it on the head circumference + 10 cm. This half-circle and the 10 cm cut down is usually enough to get your head through without difficulty and without leaving your throat and part of your lungs to be torn by seven winds at a cold festival. If you are a bubbly and active person and your soul is asking to be uncovered, then you can safely make the neck wider.

Tip!

To avoid the suffering described in the first chapter, for those who use

standard fabric width of 140 cm on the site there is a pattern generator, which will calculate

and draws your individual pattern!

The pattern generator is located here.

2. Product assembly

I highly recommend the beginner to assemble the shirt in the proper order, as written below. Otherwise there is a chance of confusing the details.

First we sew the shoulder seams. In the photo, the right places are underlined in blue.

The next step is to take the sleeves and mark the middle with a crayon on the wide part. Then take the gusset and sew it to the side of the sleeve, starting from the wide part down. In the photo the stitching place and the middle of the sleeve are marked in blue.

After reattaching the sleeve to the gusset, it's time to sew the pair to the shirt. Sew the sleeve so that the marked middle is exactly the same as the shoulder seam on the shirt. In the photo, the shoulder seams and the middle of the sleeve are marked in blue. 

In the end, after sewing the sleeves to the shirt, you should have a picture like this.

After that begins the most confusing part of the job. Sewing the sleeve with the gusset and the shirt. Yes, yes, once again, only now this composition will be the final one. The arrows are drawn below in the photo. Assemble the sleeve according to the movement of the arrows:

  • First are the blue arrows, which means we sew the sleeve from the narrow part to the wide part;
  • Second are the green arrows, which means we sew the gusset to the opposite side of the sleeve; 
  • 'Third are the yellow arrows, which means we sew the gusset to the opposite part of the shirt.

After stitching the square gusset is bent and turns into a triangle.

This is what it looks like in the photo of the finished product.

By the way, while I was cutting and sewing the shirt, the black cat turned white.

In fact, from this point only the gores remain to be sewn into the shirt. As we remember, after cutting the fabric we had 4 skinny triangles. And if we didn't make two thicker triangles right away, now is the time. Sew the two triangles together. The resulting wedge is sewn into the side of the shirt. I advise for beginners to start sewing from the bottom. In the end, the sharp corner of the wedge should be against the gusset.

If you put the shirt "on its side", the connection between the wedge and the gusset will look like this:

Once the gores are sewn into the shirt, it can be considered finished. The only thing to do is trim the edges of the hem, sleeves, and collar so they don't fall apart. In my version, the hem, sleeves and collar are additionally lined with silk for beauty. 

That's actually all. :-)